
Is a pool cover worth the investment?
Are you a pool owner seeking to maximise your pool’s usability throughout the year, regardless of the season? Well, you’re not alone.
If you already have one or are looking at getting a Reclaim Energy Hot Water Heat Pump did you know that you don’t need to have the controller mounted right next to the heat pump? Whilst the controller comes with pre wired communication and temperature sensor cables these can be extended or replaced so you can have the flexibility to locate it in a spot that you desire.
To help you and your installer to understand what is involved in mounting the controller in another location we have put together an overview of how to undertake the set up of the heat pump controller away from the heat pump.
Firstly the Reclaim Energy Co2 hot water heat pump comes with its own external smart controller that gives you full control over when you want the heat pump to run.
The Reclaim energy CO2 heat pump interactive controls and monitoring allows you the customer to take control over your energy generation and management for all your hot water needs.
Once the cover is removed from the Reclaim Energy hot water heat pump controller you can see all the connections and circuitry inside. When we are looking to change the cables inside the controller we are interested in the where the cables connect.
Looking at the picture below you will see the labeled connections as follows:
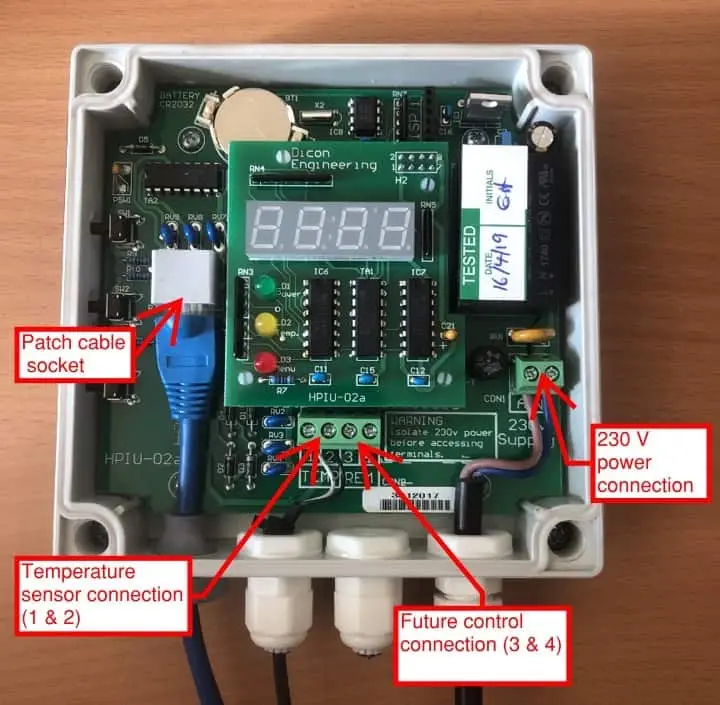
The distance the controller can be mounted from the heat pump is dictated by the length of the cables that connect between the controller and the heat pump. The maximum distance of the cable between the heat pump and the controller is 15 meters.
If you have a power point at the location where the controller is to be mounted then you only need to extend or replace the patch (communication) cable and the sensor cable.
The patch cable is the communication cable that runs between the heat pump and controller. The process of replacing the patch cable is fairly easy but we recommend it should only be undertaken by someone who is suitably qualified to undertake such works. Before any works are to commence the power should be isolated (turned off) to the controller and a suitable test undertaken to check that there is no chance of getting an electric shock.
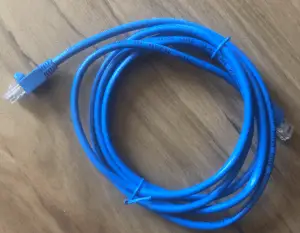
The original patch cable that comes with the heat pump controller is best removed and replaced with a new pre manufactured patch cable. The new cable must be an RJ45 Patch cable and as mentioned above is recommended to be a maximum of 15 meters in length. You will find that this type of pre manufactured cable is available at most computer stores around the country.
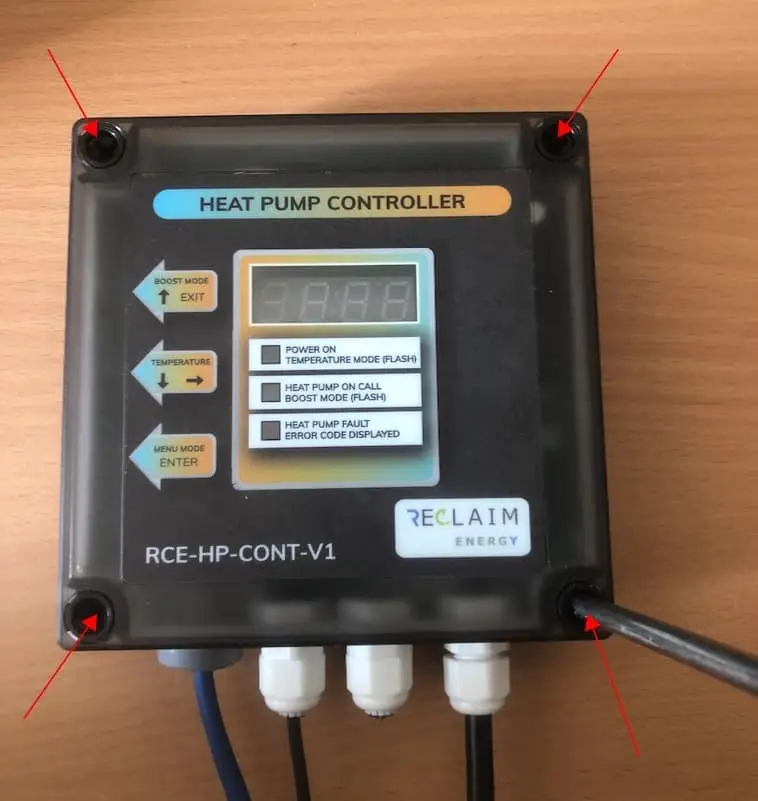
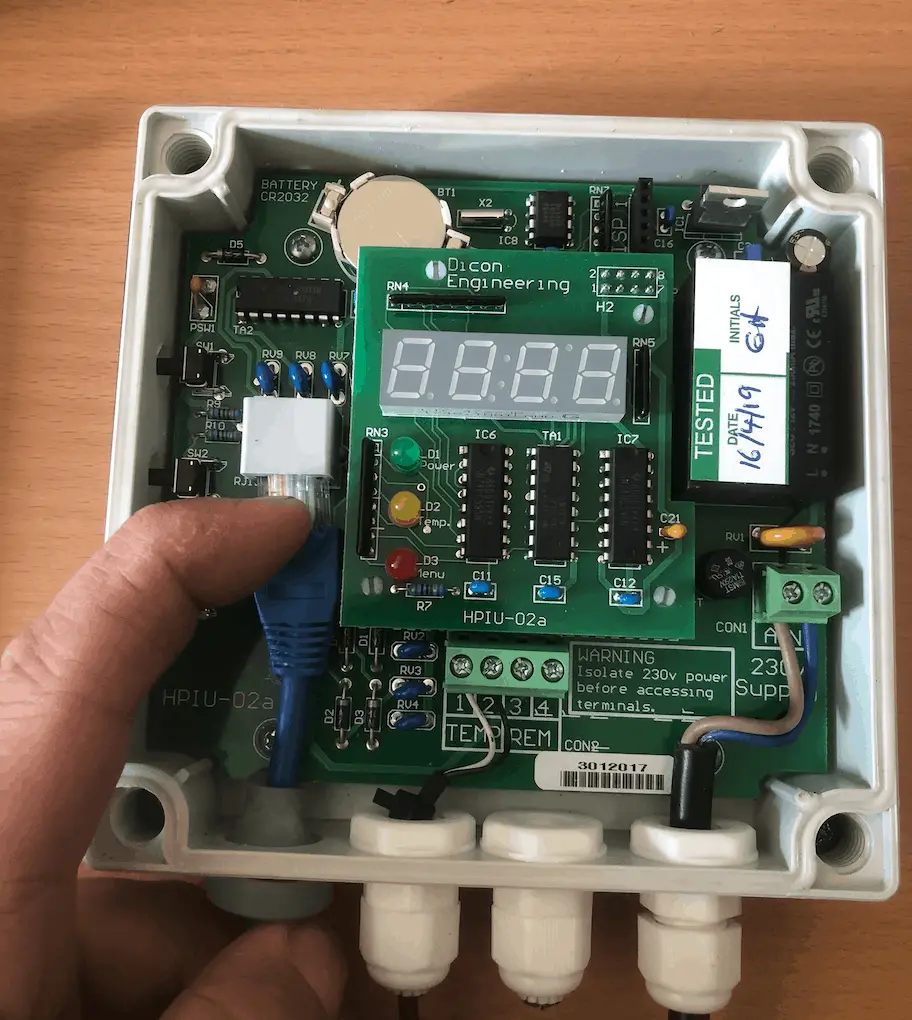
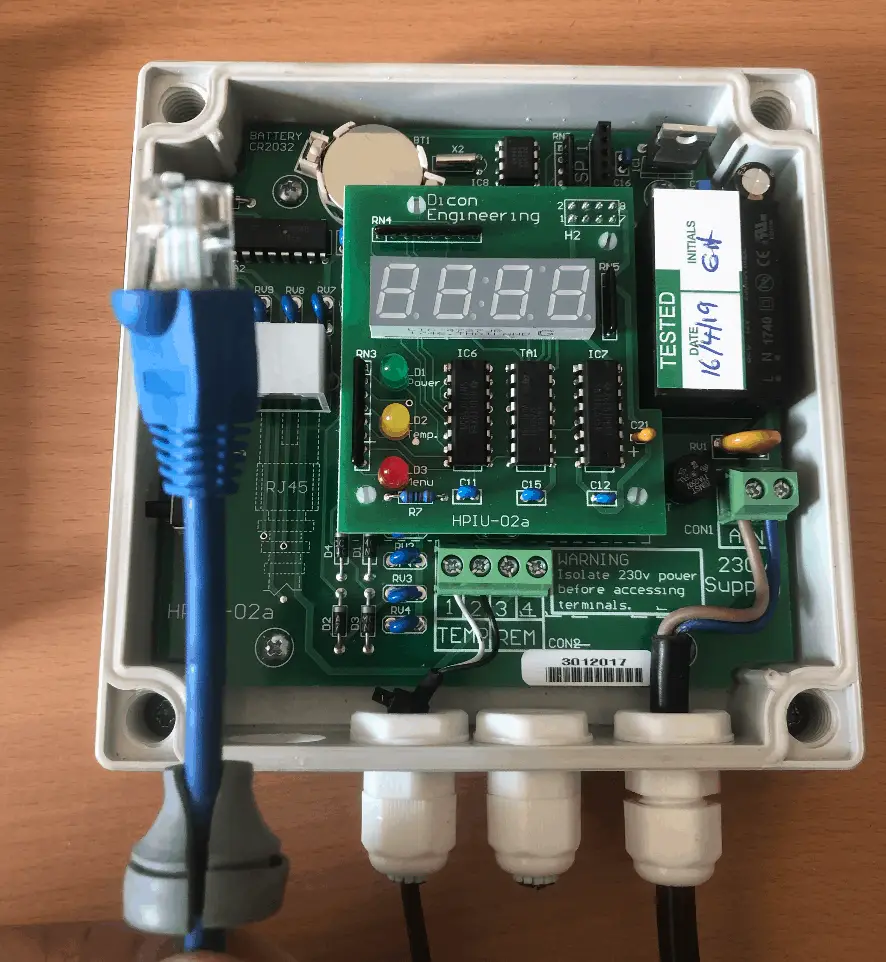
Undo the four black plastic screws in each corner of the cover and then lift of the cover.
Push down on the plastic tab that locks the RJ45 plug into the connection port whilst gently pulling the cable out of the port.
Gently pull the patch cable out of the hole in the bottom of the controller until it is completely free.
To install the new patch cable you undertake the above steps in the reverse order making sure you have the RJ45 plug up the right way before gently pushing it back into the connection port on the controller board (it will click when it is inserted correctly into place). Once the patch cable is reinstalled you can install the grey split grommet on the cable and then push it back into the cable hole that the patch cable runs though.
At the heat pump end you can now plug the RJ45 cable into the port mounted above the power supply connection on the right hand side.
The sensor cable connects between the controller and the hot water storage tank. On the end of the black rubber coated cable is a chrome tip about 50mm long, this is the part of the cable that is inserted into the sensor well opening on your hot water tank.
The purpose of the temperature sensor is to measure the temperature inside the hot water storage tank and relay this information back to the controller. This in turn controls the running of the heat pump to heat the water as required inside your tank.
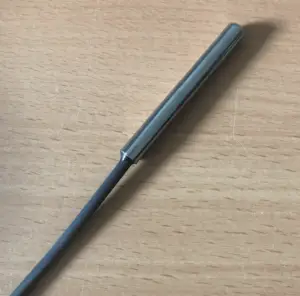
To extend the sensor cable you can use standard twin core thermostat cable or similar.
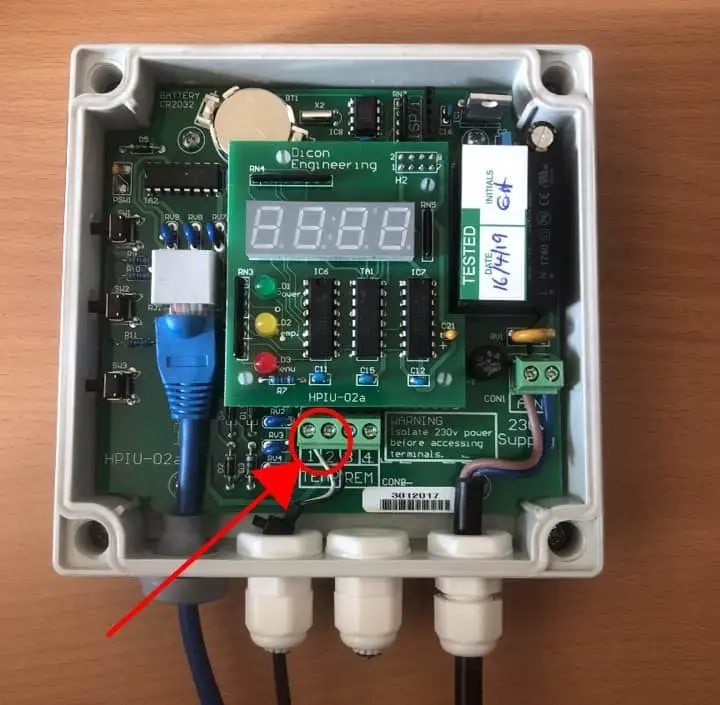
First remove the sensor cable from the controller by loosing the screws on the cable connection point (labeled TEMP 1 & 2). Then loosen the cable grommet the cable runs though and gently pull the cable out.
Next insert the sensor end of the cable into the hot water tank and run the existing cable to the point where you will join it to the extension cable. The connection of these cables is best undertaken In a suitable watertight junction box.
At the new location of the controller take the end of your temperature sensor extension cable and feed it though the existing cable grommet. Insert the cable ends in ports 1 & 2 and tighten screws. Then tighten cable grommet back up.
Make sure that your existing sensor and extension cable still correspond to the proper connections in the controller eg white wire is connected to port 1 and the black wire to port 2.
We would suggest that the connection between the cable you use to extend the sensor cable and the sensor cable itself is in a place that is accessible in the future.
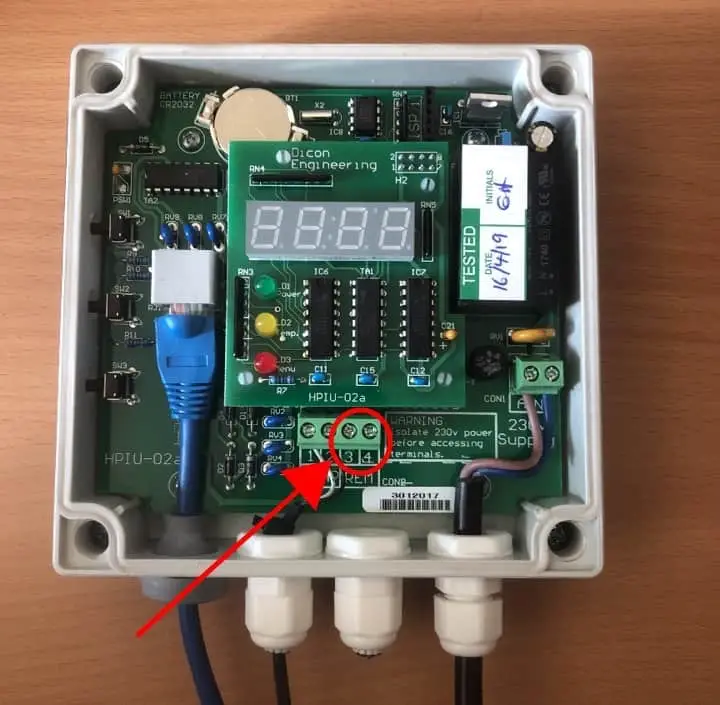
Whilst you are extending the patch and sensor cables we would suggest installing an extra twin core cable from the controller location to a spot that is accessible in the future.
This will allow for connection in the future to points that will allow external control signals from solar inverters and the like.
The cable you run for this future connection is not to be connected to the point REM 3 & 4 at this stage.
Once you have completed the installation of the new or extended cables and all your connections are checked and tightened you can replace the cover on the controller by sitting it back in place and retightening the four screws in each corner.
You can now turn the power on to your heat pump and controller and undertake the purging and commissioning steps as outlined in the instruction manual.
We hope that this above overview has either helped you to understand the flexibility of the Reclaim Energy heat pump controller and also given you a guide on what is involved. We suggest that you have the works undertaken by a suitably qualified person. As this is a guide only we cannot take responsibility for any damage caused to your or your equipment in the process of undertaking these works and ask you to please refer back to the manufactures instructions prior to undertaking works,
If you have any further any questions or comments please feel free to contact us.

With a background in plumbing and gas fitting and keen interest in renewable technologies Jonathen draws on his over 20 years experience in the construction industry to help promote and deliver truly efficient space conditioning, hot water and pool heating solutions that remove/reduce our reliance on the consumption of fossil fuels and also make better use of renewably generated electricity. With a focus on utilising Natures RENEWABLE thermal energy and the reuse of thermal energy currently wasted, Jonathen promotes the adoption of the latest in heat pump technologies to deliver a complete solution to his clients.
Jonathen is the Owner of Adelaide Heat Pumps and Adelaide Geoexchange.

Are you a pool owner seeking to maximise your pool’s usability throughout the year, regardless of the season? Well, you’re not alone.
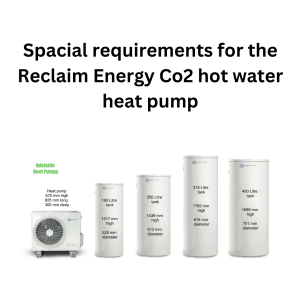
If you are considering a Reclaim Energy Co2 hot water heat pump for your home or business you are on to a

With all the talk of ChatGPT we thought it was a good time to ask it some questions about heat pumps to see what it knows. The first question we wanted to ask was, Why should we use natural refrigerants in our hot water heat pumps?
Below you can see the answer we got back…. ChatGPT is one smart cookie!

Adelaide Heat Pumps specialise in the supply and installation of quality and efficient hot water heat pumps systems all over South Australia. We can help you get your hot water back fast if your hot water system fails.
Adelaide Heat Pumps will only disconnect gas appliances and replace with efficient electrical solutions to help you make your home or business future proof.
© 2025 Adelaide Heat Pumps